When it comes to building structures that are designed to last well over 30, 40, and even 50+ years, having a solid waterproofing plan is absolutely crucial for success. It’s common knowledge that water infiltration can lead to a host of problems including mold, wall damage, and even flooding – and a foundation is no different.
Water infiltration can cause some serious headaches, both for builders and homeowners. That applies to any part of the home, but foundation failures due to water infiltration present even more problems. Due to the nature of their location (underground), and the material of the walls (concrete), it can be incredibly tough to go back and fix any issues that arise due to poor (or non-existent) waterproofing.
Here’s a buzzword that can send shivers up a builder’s spine – the call-back. This is the word used to describe a situation where, after all the time & sweat devoted to a build, an issue (usually a product failure) pops up that requires attention. And sometimes, if that failure is significant, that attention required can be incredibly costly.
That’s why it’s crucial to do it once, and do it right when it comes to installing a foundation waterproofing membrane.
These foundation waterproofing membranes come in different forms, but the most popular are liquid-applied and sheet-applied. Henry’s foundation protection line includes both the Aqua-Bloc liquid-applied foundation waterproofing membrane, and the WP200 sheet-applied foundation waterproofing membrane. Both offer fantastic protection against water intrusion when installed correctly.
Now that we’re aware of the potential damage that can arise from water intrusion, let’s take a look at the best practices of how to protect against it.
1. Make sure your foundation walls are clean and dry
In order to install a foundation waterproofing membrane, you must first ensure that your foundation walls are ready to receive it. If not, it’s likely that you’ll be stuck with a waterproofing membrane that isn’t adhering like it should (and therefore, not protecting against water intrusion like it should). Ensure your foundation is clear or any dust, debris, or excess mortar before applying your waterproofing membrane.
Take note of the recommended guidelines for concrete curing – usually 7 to 28 days. This is a time period where concrete is still developing it’s intended strength and durability, so it’s important to follow the installation guidelines of your waterproofing membrane to ensure a strong system.
Important note – It’s best practice to use a primer (such as Henry’s Aqua-Tac primer) before applying your waterproofing membrane to ensure optimal adhesion.
2. Install waterproofing membrane according to specs
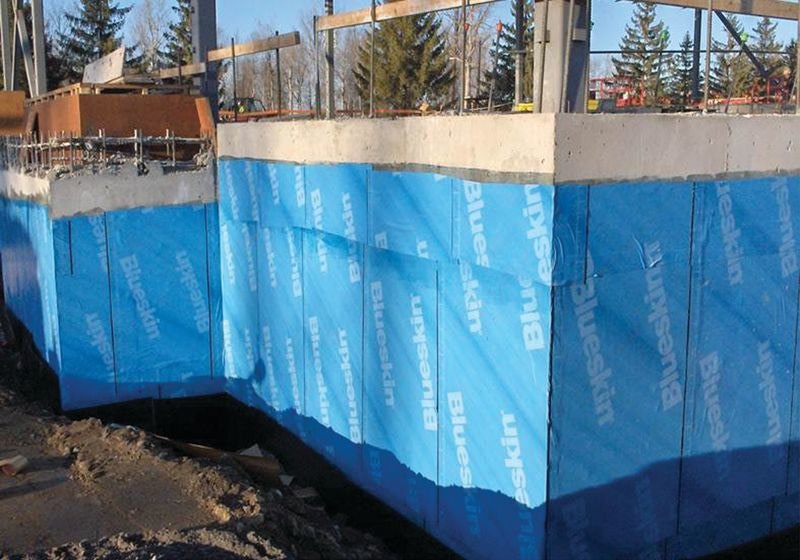
After your foundation is cured, cleaned, and primed, it’s time to install your membrane. Installation is one of the biggest determiners of your project’s success, so it’s crucial that your waterproofing membrane is installed according to the manufacturer’s specs.
If you’re installing a liquid-applied membrane, it can either be troweled on or sprayed on. It’s important to make sure that you’re applying it to the specified thickness (80 mils thick wet, and 48 mils thick when dried if you’re using Henry’s Aqua-Bloc). This step is crucial when it comes to the product performing correctly. Also take note of the required drying time, and ensure membrane is completely dry before back filling.
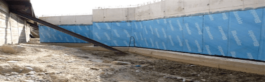
If you’re installing a sheet-applied membrane such as the Henry WP200, ensure that you are applying the sheet according to coverage guidelines specified by the manufacturer (2 1/2″ laps if using WP200). To ensure water tight protection, seams also need to be sealed with a waterproof sealant such as Henry’s Moistop sealant.
3. Install a drainage board to flush bulk water
The last step when it comes to installing a successful waterproof membrane for your foundation, but it’s an equally important one.
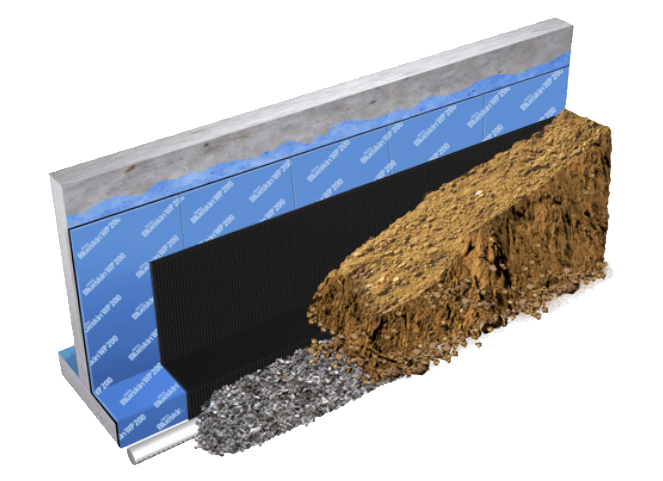
Water gets built up in soil after rainfall, and that water often flows towards our foundation structures. The waterproofing membrane protects against intrusion, but it’s not designed to be constantly hit with bulk water. This is where a drainage board comes in.
A drainage board (such as Henry DB200) consists of a sheet of plastic type material that is filled with holes that drain water down, out, and away from a foundation. It’s installed directly over the waterproof membrane, and it adds a protective layer to your system that helps flush water away before it even reaches the foundation itself.
Overall, it’s very important to look at your foundation waterproofing plan as a system – all the products need to compliment each other and work together to help keep water & moisture out. A little thought and implementation when it comes to the best practices of foundation water proofing can help keep your next build dry for decades to comes.
Holden Humphrey carries the entire range of Henry waterproofing products. Please call 800-777-1053, or reach out to your Holden Humphrey sales representative to talk more about how the Henry line of products can help protect your next build.